

I noticed it on a Sunday morning — a dark, fuzzy patch spreading near the exhaust fan corner of my bathroom ceiling. My first thought was, “That’s just some discoloration from steam.” I wiped it with a damp cloth, painted over it a week later, and completely forgot about it.
Three months after that, it was back. Bigger. Darker. And this time, my wife pointed out a faint musty smell that I’d been blaming on our old bath mat.
That was my introduction to bathroom ceiling mold — and honestly, I handled it all wrong the first time. If you’re dealing with the same thing right now, let me save you the frustration of repeat treatments and wasted paint.
Why Bathroom Ceilings Are Mold Magnets
Before you grab the bleach, it helps to understand why the ceiling keeps getting hit. Hot showers push warm, moisture-heavy air upward. If your exhaust fan is weak, absent, or clogged with dust (mine was caked — hadn’t cleaned it in over a year), that humid air just sits against the ceiling and slowly feeds mold spores.
Mold only needs three things: moisture, a surface to latch onto, and warmth. Your bathroom ceiling is essentially a five-star hotel for it.
The most common bathroom ceiling mold is Cladosporium or Aspergillus — the black or greenish-black kind you’re probably looking at right now. In some cases it can be Stachybotrys (true black mold), which is more serious and needs professional remediation if the patch is larger than about 10 square feet. If what you’re seeing is fuzzy, slimy, and spreading fast, or if you’re getting headaches and respiratory irritation, please don’t DIY it — call a pro.
For most bathroom ceiling situations, though — a patch the size of a dinner plate or smaller — you can handle this yourself over a weekend.
What You’ll Actually Need
I made the mistake of going straight for the bargain-bin spray cleaner. It masked the problem for about six weeks. Here’s the gear that genuinely worked:
- White distilled vinegar (undiluted) — my first choice for light mold
- Hydrogen peroxide (3%) — great for porous painted surfaces
- Bleach solution — 1 cup bleach to 1 gallon water for stubborn or deep-set mold
- Spray bottles — one for each solution, labeled clearly
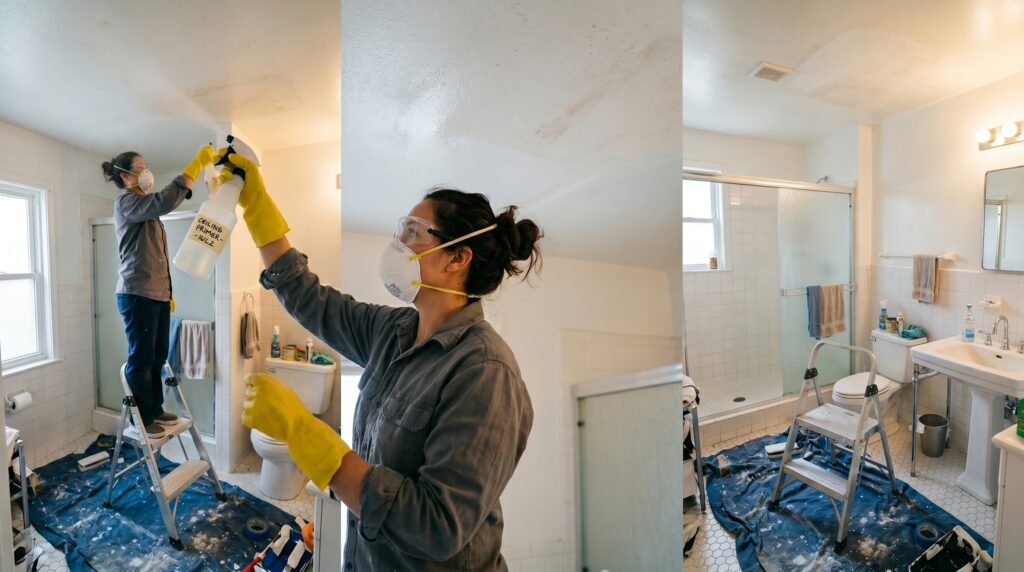
- N95 respirator mask — not a paper dust mask, an actual N95
- Safety goggles — bleach drips from a ceiling are genuinely awful
- Old clothes you don’t mind ruining
- Long-handled scrub brush or sponge on a pole
- Drop cloth or old towels for the floor
- Mold-resistant primer (Zinsser Bulls Eye 1-2-3 or Zinsser Mold Killing Primer are solid picks)
- Mold-resistant ceiling paint (I used Rust-Oleum Mold & Mildew Proof Paint)
A quick note on the bleach vs. vinegar debate: vinegar (acetic acid) is better at penetrating porous surfaces and actually killing the root structure. Bleach works fast and disinfects the surface, but on porous painted drywall, it mostly bleaches the color without killing the roots below. I now use vinegar first, let it dry, then follow with a light bleach wipe to disinfect.
Step-by-Step: How to Remove Mold from Bathroom Ceiling
Step 1: Ventilate the Bathroom
Open the window, turn on the exhaust fan, and if possible, set up a portable fan blowing outward through the doorway. You do not want to breathe in mold spores that get disturbed during cleaning. Put on your N95 and goggles before you even open the cleaning products.
Step 2: Protect the Floor and Yourself
Lay down the drop cloth. Put on your old clothes, gloves, and eye protection. If you’re using bleach, add a long-sleeved shirt — drips from above happen constantly.
Step 3: Dry-Wipe the Loose Mold First
Gently press a dry paper towel against the mold patch to pick up loose spores before you wet the area. This sounds counterintuitive, but wetting mold first can cause spores to scatter into the air more easily. Bag the paper towels immediately and seal them.
Step 4: Apply Your Cleaning Solution
For mild mold (early-stage, small patch): Fill a spray bottle with undiluted white vinegar. Spray generously onto the mold patch and the area a couple inches around it. Let it sit for at least 30 minutes — don’t rush this. The longer it dwells, the better it penetrates.
For stubborn or darker mold: Mix your bleach solution (1 cup bleach to 1 gallon of water) in a spray bottle. Spray it on, wait 15–20 minutes.
Do not mix bleach and vinegar. I know that sounds obvious, but when you’re frustrated and staring at a gross ceiling, it’s tempting to think “more is better.” It’s not — it creates chlorine gas.
Step 5: Scrub Gently
Using your long-handled brush or a pole sponge, scrub the area in small circular motions. Don’t scrub so hard that you damage the drywall or plaster. Rinse the brush/sponge frequently in clean water and wring it out.
If mold seems to go deep into the paint or the surface feels soft and spongy, that’s a sign the drywall underneath is water-damaged. In that case, you’ll need to cut out and replace that section — cleaning the surface won’t solve it.
Step 6: Rinse and Dry
Wipe the area with a clean damp cloth to remove the cleaning solution, then dry it as thoroughly as you can with a dry towel. Leave the fan running and the window open for several hours.
This is critical — any moisture you leave behind is an invitation for mold to return.
Step 7: Let It Fully Dry (Seriously, Wait)
I gave mine 24 hours before doing anything else. The surface should feel completely dry to the touch and there should be no visible dampness. If your bathroom is in a particularly humid climate, give it 48 hours.
Step 8: Apply Mold-Killing Primer
This is the step most people skip, and it’s why their mold comes back.
Pick up a can of Zinsser Mold Killing Primer (it’s water-based, low odor, and works well on ceilings). Apply one coat with a roller — an angled brush for the edges. This seals the surface and kills any remaining spores the cleaning solution missed.
Let it dry fully per the manufacturer’s instructions (usually 1–2 hours).
Step 9: Paint with Mold-Resistant Paint
Once the primer is dry, finish with a mold-resistant ceiling paint. You’ll likely need two coats. Rust-Oleum makes a decent one, and Sherwin-Williams Duration is also highly rated for humid environments.
This paint has an antimicrobial additive that slows future mold growth — it’s not a magic shield, but combined with better ventilation, it makes a real difference.
The Mistake I Made (Don’t Do This)
I painted directly over the mold the first time. Just grabbed whatever white ceiling paint was in the garage and rolled it on. Looked clean for about six weeks.
Then the mold bled through the paint like a bruise, and I had to do the whole thing over again properly. The lesson: you can’t trap mold under paint and call it solved. The mold is alive. It’ll find a way back.
Also — don’t skip the respirator because you think the mold patch is “small.” I cleaned a patch barely bigger than my hand without a mask and had a scratchy throat for two days afterward. Not fun.
Common Mistakes to Avoid
Using a regular cloth instead of disposable materials. You’ll spread spores to other parts of the bathroom. Use paper towels or rags you can immediately throw away.
Cleaning without fixing the source of moisture. If your exhaust fan isn’t working properly, or if you have a roof leak, the mold will return no matter how thoroughly you clean. Check that your fan actually vents outside the house, not just into the attic (a surprisingly common setup error).
Not wearing eye protection. One drip of bleach in the eye from a ceiling job is genuinely an ER-level mistake. Just wear the goggles.
Assuming it’s “just mildew.” Mildew is surface-level and usually white or grey. Black or greenish growth that’s fuzzy or spreading is mold. Treat it accordingly.
Keeping It From Coming Back
After dealing with this twice, I made some changes that have kept the ceiling mold-free for over a year now:
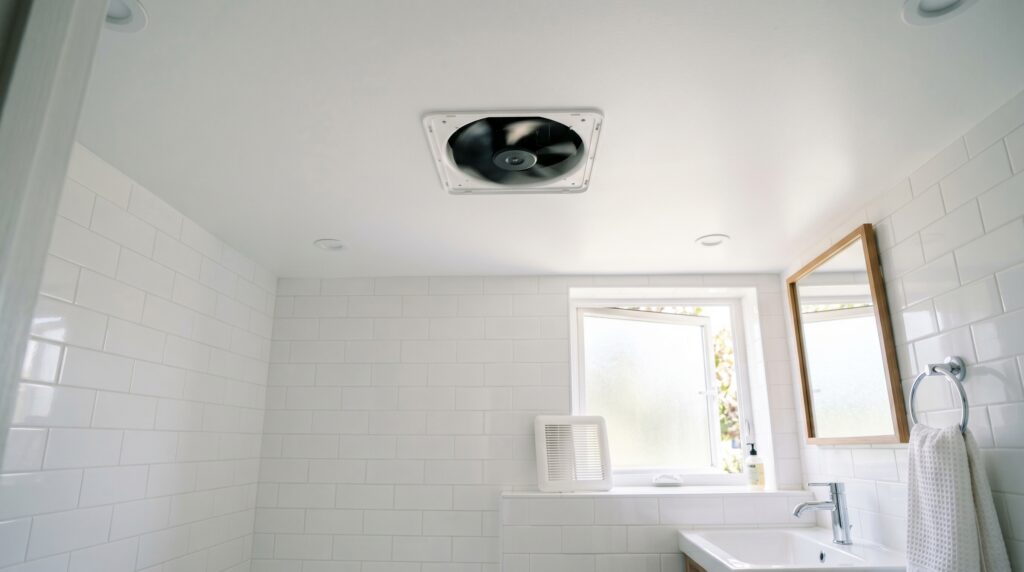
Cleaned the exhaust fan. I popped off the cover, vacuumed out the dust, and discovered the motor was barely spinning. Replaced it with a Panasonic WhisperCeiling fan — quiet, efficient, and it actually moves air. Game changer.
Started running the fan longer. The fan runs during every shower and for at least 20 minutes after I’m done. I set a phone timer. It’s a small habit that makes a big difference.
Cracked the window when possible. Even in cooler months, a few inches of airflow helps air exchange dramatically.
Monthly wipe-down. Once a month I spray a little white vinegar on the ceiling and wipe it down as part of my regular cleaning. Takes two minutes and stops small growth before it starts.
When to Call a Professional
If the mold patch is larger than 10 square feet, if it keeps coming back aggressively even after proper treatment, if you notice soft or warped drywall, or if anyone in your household has respiratory issues, asthma, or mold allergies — call a certified mold remediation company. The EPA has guidelines on this and it’s worth following them.
Mold remediation pros have containment equipment and HEPA-filtered tools that prevent spores from spreading during removal. For serious infestations, that matters a lot.
Final Thoughts
Bathroom ceiling mold is one of those things that looks worse than it usually is — but it’s also easy to underestimate if you just paint over it and move on. The actual cleaning process isn’t complicated or expensive. The key is being thorough: kill the mold properly, seal it with the right primer, paint with the right product, and then actually fix the ventilation problem that caused it in the first place.
The $40 I spent on a new exhaust fan was the most effective mold prevention investment I made. Better than any spray or paint.
If you’re staring at that dark patch on your ceiling right now, don’t stress — just don’t grab the paintbrush yet.